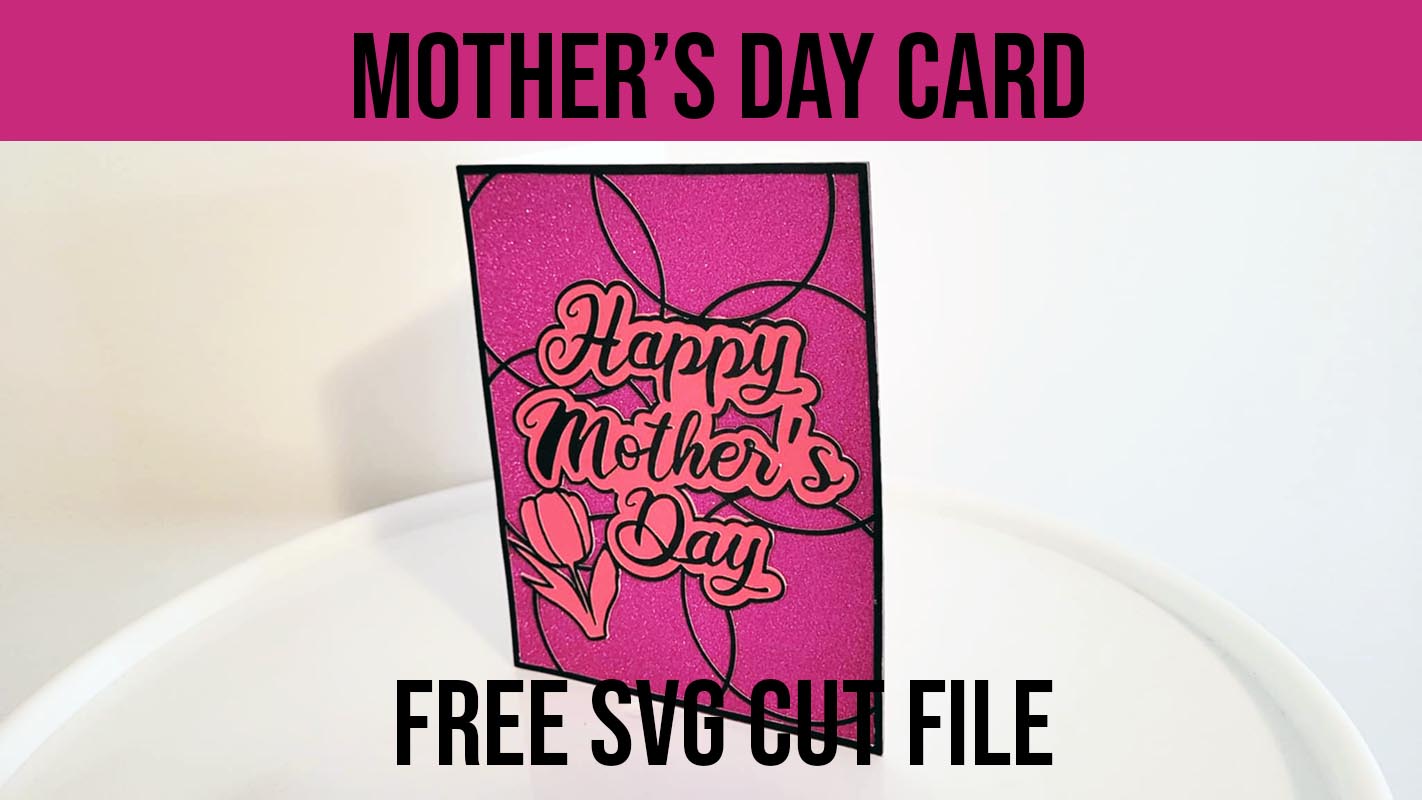
Mother’s day is a special day to celebrate your mom for taking such good care of you. Use this Mother’s day card free svg file and tutorial to make a special handmade creation.
My post contains some affiliate links so if you make a purchase after clicking on a link I may receive a commission but it will not cost you anything. Read my disclosure here.
This Mother’s day card cut file is perfect for making a heart warming card for your mother. If you would like more free Mother’s day crafts than check out these other free designs found on my blog.
To get the free file to make some fun Mother’s Day crafts just use the newsletter sign up form below and the pdf file will be sent directly to your inbox. Find lots more free designs here.
First download the free file, then select the upload button in the bottom left to open it in Cricut design space.
In the following screen select the green “Continue” button.
In the next screen select the green “upload” button
Now you will see the file displayed in design space canvas. Click the layer to expand.
Move the layer with the purple rectangle to the top of the layers. This will separate it from the layers group.
Then select the score line, you will see its set to “basic cut”. Select the layer and change the “operation” to score. This is located in the top window.
Select these two layers, the purple card and score line and then press the attach function so that it will cut and score together.
Now select the black outline layer and drag it to the top of the layers menu so it separates from the group.
You will see that there are two layers. Press attach so that the black layers all cut together as one.
Select the “Happy Mother’s day” text layers and drag them to the top to seperate them from the group.
Select the layers and press “Attach” so that all the layers cut together.
Now press the green “Make” button to move to the next screen.
In the “Prepare” screen you will see how each color cuts on a seperate mat, one at a time. Now is the time to cut your paper into the correct sizes.
Here you see all the papers cut out for the correct size for each layer. I will load them one at a time or if you have lots of mats you could place them all onto individual mats.
I recommend using the green cutting mat and using painters tape around the edges of the paper to hold it in place because it can shift on the mat.
Once your papers are all cut out and your cutting mat is prepared, press the green “Continue” button.
In the “Make” page select the material setting that corresponds to the paper you will be using. You may need to do a test run first so you don’t waste you good paper. I selected “Medium Cardstock”.
When you are ready load the cutting mat with the paper into your Cricut cutter and press the flashing “C” on the machine for it to cut.
Below you see the black outline layer is cut out and ready to be removed from the cutting mat.
If you have one mat remove this layer and place the paper for the next layer and reload it to the Cricut machine and press the flashing “C” button. Continue this way until all the layers are cut, making sure to follow the instructions on the screen.
For the card layer you will need to load a score tool to make the score line.
Below you will see all the layers cut out and ready to be assembled.
Begin with the black outline layer. Place a super thin line or dots of glue on the back, if you don’t have a super small applicator than use a toothpick. Try to not add to much because this will pool up along the edge when you press it down and it will show.
Then set it to the side to dry entirely, make sure to be patient and wait for each layer to be fully dry before moving to the next step.
Once the black outline layer is dry add some glue to the back of the text and place that onto your design.
Now place a tiny amount of glue along the black border and a bit on the circles, focus more on the border, and attach it to the card front. I recommend to wait between layers before moving to the next step.
Take the completed card front and attach it to the greeting card. Now your card is complete.
I’m sure now that you’ve snagged these fantastic Mother’s day printable and maybe you are looking for more fun designs to make more Mother’s day crafts. Here is a selection of more designs from other artists to make your own crafts:
I hope you enjoy this file and use it to make lots of fun crafts for Mother’s Day. Please leave a comment below, especially if you used this design. And if you enjoyed this post please share on pintrest using the image below.
Please note that my printables are intended for personal use only. They cannot be sold or utilized for commercial purposes.
Hi I'm Catherine and I'm so glad you've decided to stop by and make stuff with me! My blog is full of fun project for kids and busy parents.
View all posts by Catherine


