Being able to upload your own files to Cricut Design Space is a great way to create your own customized designs, clothing and home decor items. I’ve created an easy step by step tutorial to walk your through how to upload designs to Design Space.
My post contains some affiliate links so if you make a purchase after clicking on a link I may receive a commission but it will not cost you anything. Read my disclosure here.
When you are first starting out with your new Cricut machine it can seem overwhelming. You may have lots of great ideas and good intentions to become a crafista but now your not quite sure where to start. If you’ve had the chance to putter around Design Space and you’ve had a look at the software and all the images available on the Cricut site, maybe you are ready now to move on to the next step.

I’m sure you’ve browsed around pintrest and maybe sites like etsy to see all of the SVG cut files for sure but you are not sure how to upload them to Design Space for you to use them. But don’t worry this easy tutorial will help you from start to finish on uploading your own or purchased designs.
If you are a beginner and looking for some help than check out my free Cricut Crash Course to help your get started with your new machine!
Maybe you purchased an SVG from an online shop and now you are not sure what is the next step to get them into Design space to use. Well today I am going to walk you through step by step how to get your fabulous new SVG file into Design space so you can get crafting.
If you bought an SVG file from an online shop such as Etsy or Design space than you probably received a .zip file. The first step is to unzip the file. You can find instructions here on how to unzip a file.
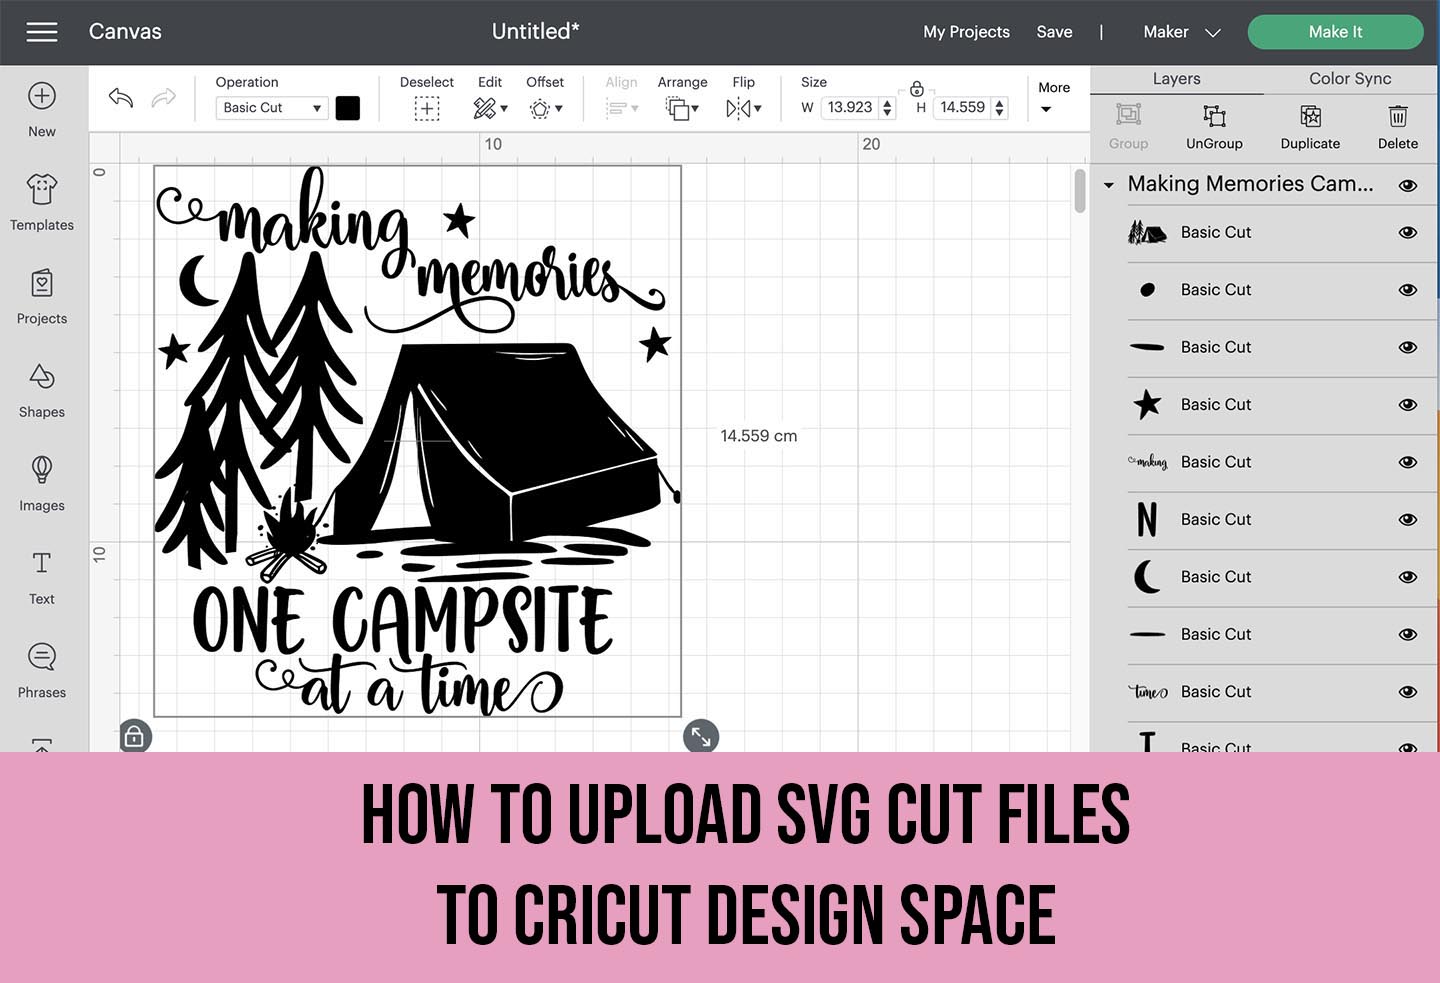
Today I’m going to be using this design from Design Bundles. You can download it for free here
Step One
Log into Cricut Design Space and select the Green “New project” button to begin a new project.

Step Two
Click the upload button in the bottom left side of the canvas screen.

Step Three
Select the “Upload Image” button to access your files.

Step Four
The next screen select the browse button. At this point you can locate the files on your computer and select them to upload. Select the SVG file that you want to upload to Design Space.

Step Five
You will see your image and now select the green “Upload” button in the bottom right corner.

Step Six
Now select the image in the “Recent Uploads” section so it is outlined in green. After select the green “Add to Canvas” button in the bottom right corner.

Step Seven
Now you will see your SVG image displayed in the Design Space Canvas with the layers on the right. Now you SVG cut file has been succesfully uploaded and is ready for you to edit or cut out!

As you can see uploading an SVG is very easy and if you where to upload a jpg or other file than there are different steps. This is why so many designers choose to work with SVG files because they are so easy.
Get the free cheat sheets on how to upload an SVG cut file to Cricut Design Space and print them off as a quick reference.

