If you love cake decorating and you have a Cricut than it may have popped into your head to make your own cake toppers. Cake toppers come in a variety of styles and the limit is only what your imagination can come up with.
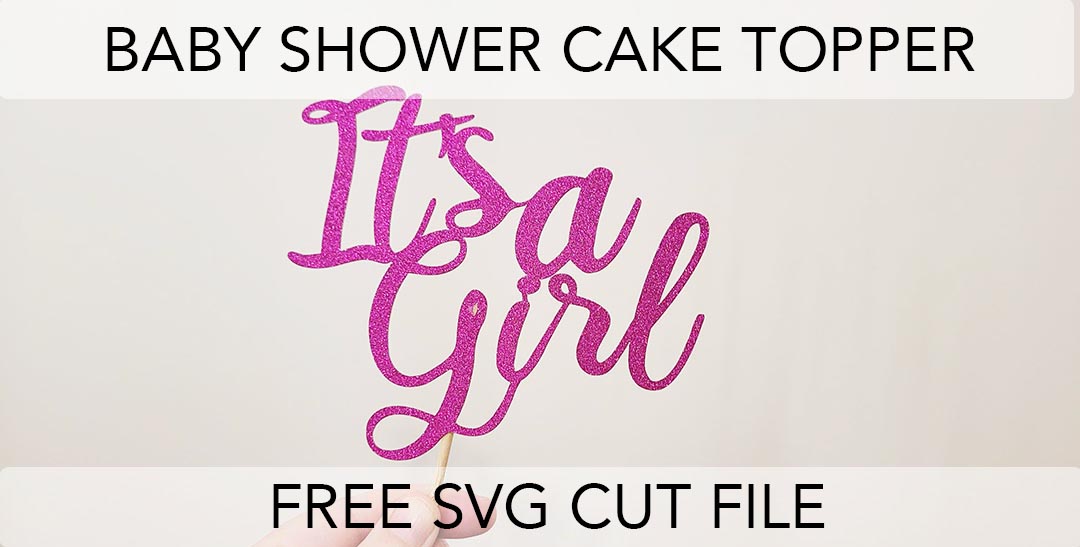
Making a cake topper with glitter cardstock is an easy way to make a design for any occasion. Today I am going to be making a baby shower cake topper. This is very easy to make and you can make the same design with the free svg cut file I’ve designed and your Cricut machine.
The free svg file includes a design for both a boy “It’s a boy” and girl “It’s a girl design.
Topper size
If you are doing a tiered cake normally the top tier is 6″ but check with your baker if you are not sure. A 5″ tier should be a good size for most cakes.
What material do you use for a topper?
There are lots of different materials you can use the one I recommend for when you are just getting started is paper. It’s accessible and you probably already have it in your stash. Also as an added bonus it’s cheap and you can buy it at any craft store or online.
I recommend using a heavy cardstock or glitter cardstock, anything that is heavier than paper.
What kind of stick?
You can use a chicken skewer or you can also use a candy stick same as you would use for a cake pop. You want the length to measure 5″-6″.
After you have downloaded the free SVG cut file, open up Cricut design space. Then select the “Upload” button in the bottom left corner.
Step two
Select the “Upload Image” button and than select the svg file. More than likely you will find it in your download folder.
Than select the image of the file to highlight it and press “Add to Canvas”.
Step three
Now you will see the files displayed on the canvas. Select the “Ungroup” button to seperate the two layers. And press the eye graphic next to the layer you want shut off to work one at a time.
Step four
Now that the one layer you want is displayed. Check the size to make sure it will be the right size for your top cake layer. The current file should measure 5″ which is suitable for a 6″ cake.
When you are satisfied press the green “Make it” button in the top right corner.
Step five
On the Prepare screen you will see your design where it will be cut on your mat. Now is your chance to move it around if you want to cut it in a different spot.
Also if you want to cut a matchin back peice, select the mirror button to flip the image and cut a second peice that can be glued to the front.
When you are happy with the layout press the green “Continue” button in the bottom right corner.
Step six
The next screen is the Make screen. Here you can select your base material type. I have selected the “Glitter Cardstock” presetting.
Cricut design studio will now guide you on what blade to use and you can adjust the pressure if you like.
Step seven
Now place you cardstock onto a blue sticky mat. If your mat is a bit older or used like mine is than you can place painters tape around the edge to hold it firmly in place while it cuts.
Than load the paper into your Cricut machine and press the glowing “C” button to cut out.
Step eight
Once your design is cut out remove the tape and now peel away the mat from the paper and not the opposite. Make sure to not peel the paper from the mat because your paper will curl.
Now your design is all cutout and ready to be mounted onto the stick.
Step nine
You can use a candy stick similar to what you use to make cake pops or candies. Today I will be using a chicken skewer because it is what I have on hand. I cut it down to 6″ but you can cut it shorter at 5″ if you prefer.
Step ten
To adhere the stick to the design you can use double sided tape or a hot glue gun. I placed a tiny bit of hot glue onto the middle part of the design and then pressed the stick in place. Make sure not to move it or pick it up until the glue cools.
All done!
Now your cake topper is complete. Wasn’t that easy? You can also shrink the design down and mount them onto tooth picks to make cupcake toppers.
I hope that you enjoyed this tutorial. Please share on pintrest is your found this post inspiring, using the image below.
Hi I'm Catherine and I'm so glad you've decided to stop by and make stuff with me! My blog is full of fun project for kids and busy parents.
View all posts by Catherine


